Skip to content
wordpress redis speeds up WordPress noticeably because I cache dynamic database queries as objects in RAM and thus reduce the load on the CPU. I configure caching specifically from object to page to server caching and combine Redis with suitable plugins so that page requests are significantly faster and the time-to-first byte is reduced.
Key points
Before I go any deeper, I'll summarize the most important adjustments that make WordPress with Redis really fast and at the same time keep it clean and manageable. I focus on object caching with Redis, supplement it sensibly with page cache and CDN, and check every change with measured values. I choose a hosting plan that provides Redis reliably and offers enough RAM for the cache. I run Redis securely, delimit instances and clear the cache in a controlled manner. I keep the configuration lean, measure regularly and readjust if necessary.
- Object cache in RAM reduces queries and shortens response times.
- Page cache adds Redis, especially for anonymous visitors.
- RAM budget and LRU strategy ensure consistent performance.
- Safe Connection and separate DB IDs prevent conflicts.
- Monitoring with metrics shows real effects of each change.
Why caching is mandatory in WordPress
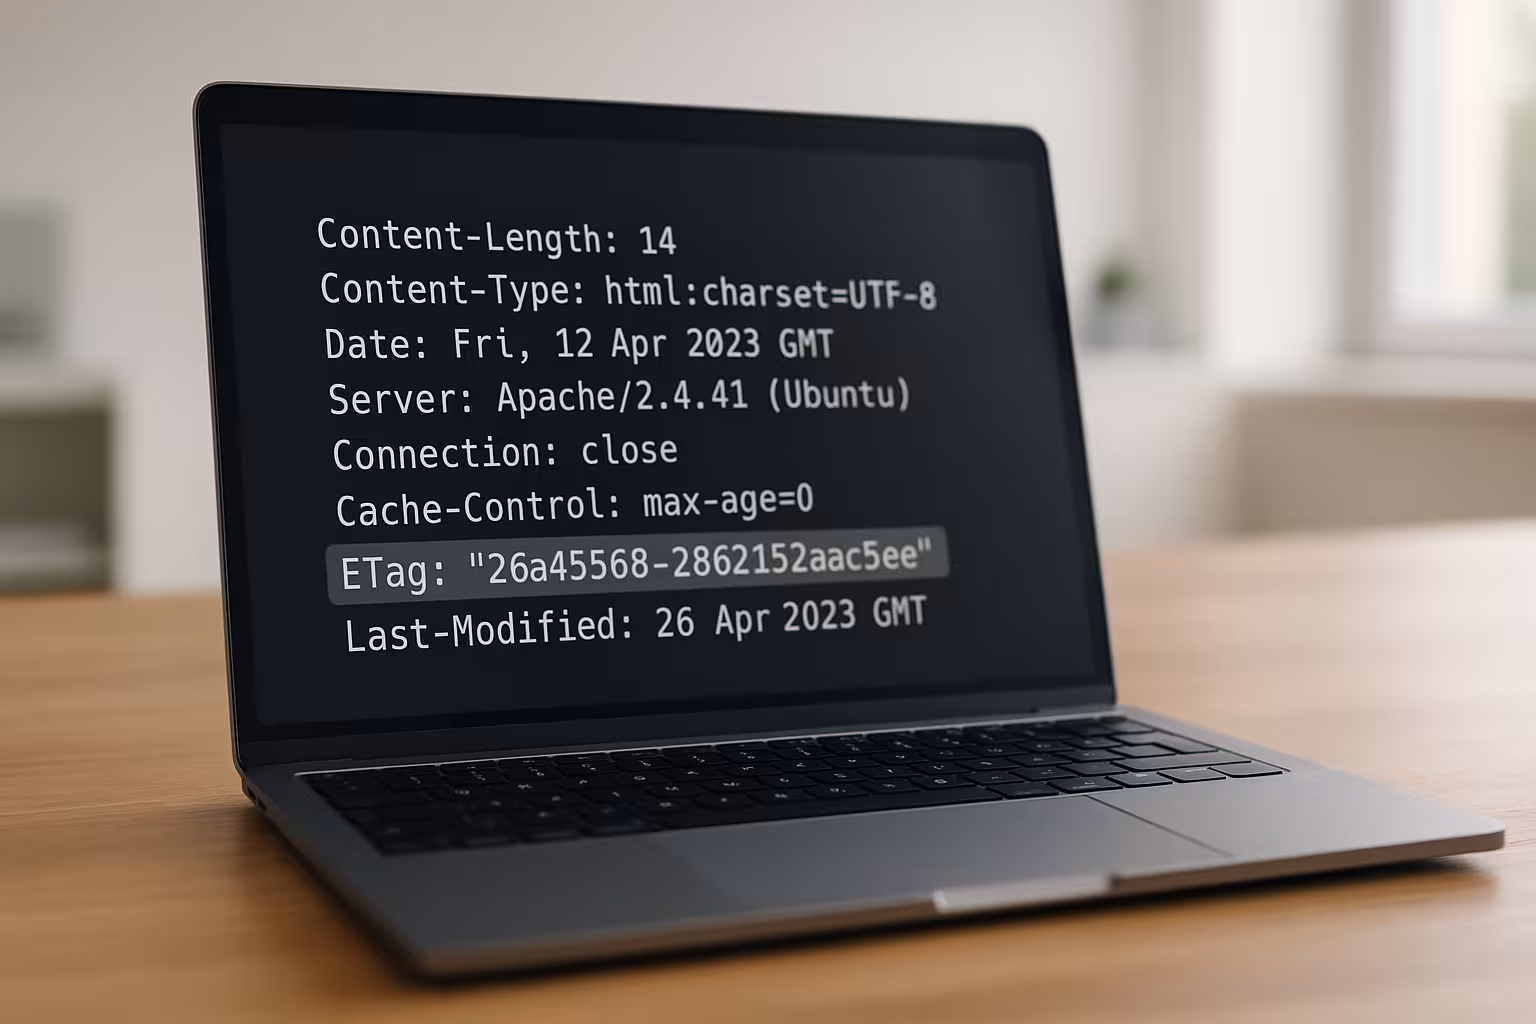
WordPress generates each page dynamically, which triggers many database queries and leads to noticeable waiting times without a cache. I interrupt this expensive cycle by saving calculated results in the Cache and deliver it directly the next time it is called. This reduces the load on PHP and MySQL, and response times are significantly shorter. Measurements show that object caching massively reduces loading times; example values move down from 800 ms to around 450 ms [1][2]. Search engines rate short response times positively, and visitors stay longer because pages including Assets open faster [1][2][5].

How Redis works in the object cache
Redis keeps frequently used objects in the working memory and delivers them without going through the database. In WordPress, for example, the results of WP_Query, option values or transients end up directly in the RAM-cache. This drastically reduces the round trips to the database and saves server time for complex joins or sorting. Unlike a pure page cache, the page remains dynamic because Redis provides data blocks that WordPress then combines. This approach is ideal for stores, member areas and highly personalized components, where complete pages are rarely identical and a fast Object-access helps noticeably [1][2][3].
What exactly ends up in the cache - and what should not
Not every object is suitable for persistent caching. I deliberately leave dynamic or security-critical data (e.g. nonces, sessions, login states) out of the equation, or I assign them to non-persistent groups. More stable content such as query results, option values, menus, taxonomy maps or product lists are very good candidates. In more complex setups, I define global groups (e.g. for options) that are the same installation-wide, and non-persistent groupswhich must remain fresh per request. This keeps the cache consistent and prevents volatile values from becoming obsolete.
For multi-instance or multisite environments, I set a unique prefix so that keys remain cleanly separated and keys from different projects do not overwrite each other. I use a speaking salt/prefix for this, ideally with an environment reference (staging, prod):
// wp-config.php (example)
define('WP_CACHE_KEY_SALT', 'acme_prod_');
define('WP_REDIS_PREFIX', 'acme_prod_'); // depending on the plugin supported
This means that keys can be purged in a targeted manner and I can see at a glance in tools or logs which project an entry belongs to. Especially in CI/CD workflows, this saves me the guesswork of selective invalidations.
Set up Redis: Step-by-step on the server
I first install the Redis service on the server and check whether it is accessible. On Debian/Ubuntu, I update the package lists, install Redis and test the connection with PING. I then add the Redis extension to PHP so that WordPress can speak. I then activate a suitable object cache plugin in the backend and connect WordPress to the service. This provides a fast Object-cache, which reliably supplies data from the memory.
sudo apt update
sudo apt install redis-server
redis-cli ping # Expected: PONG
sudo apt install php-redis
In the next step, I activate the "Redis Object Cache" plugin in WordPress and check the connection status. Many hosters already include Redis or allow it to be activated in the panel, making the connection particularly easy. I make sure that the socket or TCP settings are correct and clear the cache once after activation. I then measure the response times again to check the effect of the Amendment can be clearly seen [2][3][4].

Serializer, compression and PHP redis options
How data ends up in Redis affects speed and RAM consumption. If available, I use an efficient serializer (e.g. igbinary) and optional compression for large objects. This reduces the memory load and speeds up deserialization. Many plugins offer switches for this in the settings; alternatively, I set constants in wp-config.php if the plugin evaluates them. Rule of thumb: Large, rarely changed objects benefit particularly, very small keys rather less.
// wp-config.php (example, depending on the plugin)
define('WP_REDIS_SERIALIZER', 'igbinary'); // or 'php'
define('WP_REDIS_COMPRESSION', true);
define('WP_REDIS_MAXTTL', 86400); // Max. Lifetime (1 day)
With a reasonable MaxTTL I prevent "eternal" entries that are never updated. This keeps the cache fresh and prevents inconsistent display states [1][4].
Redis and WordPress plugins: powerful combinations
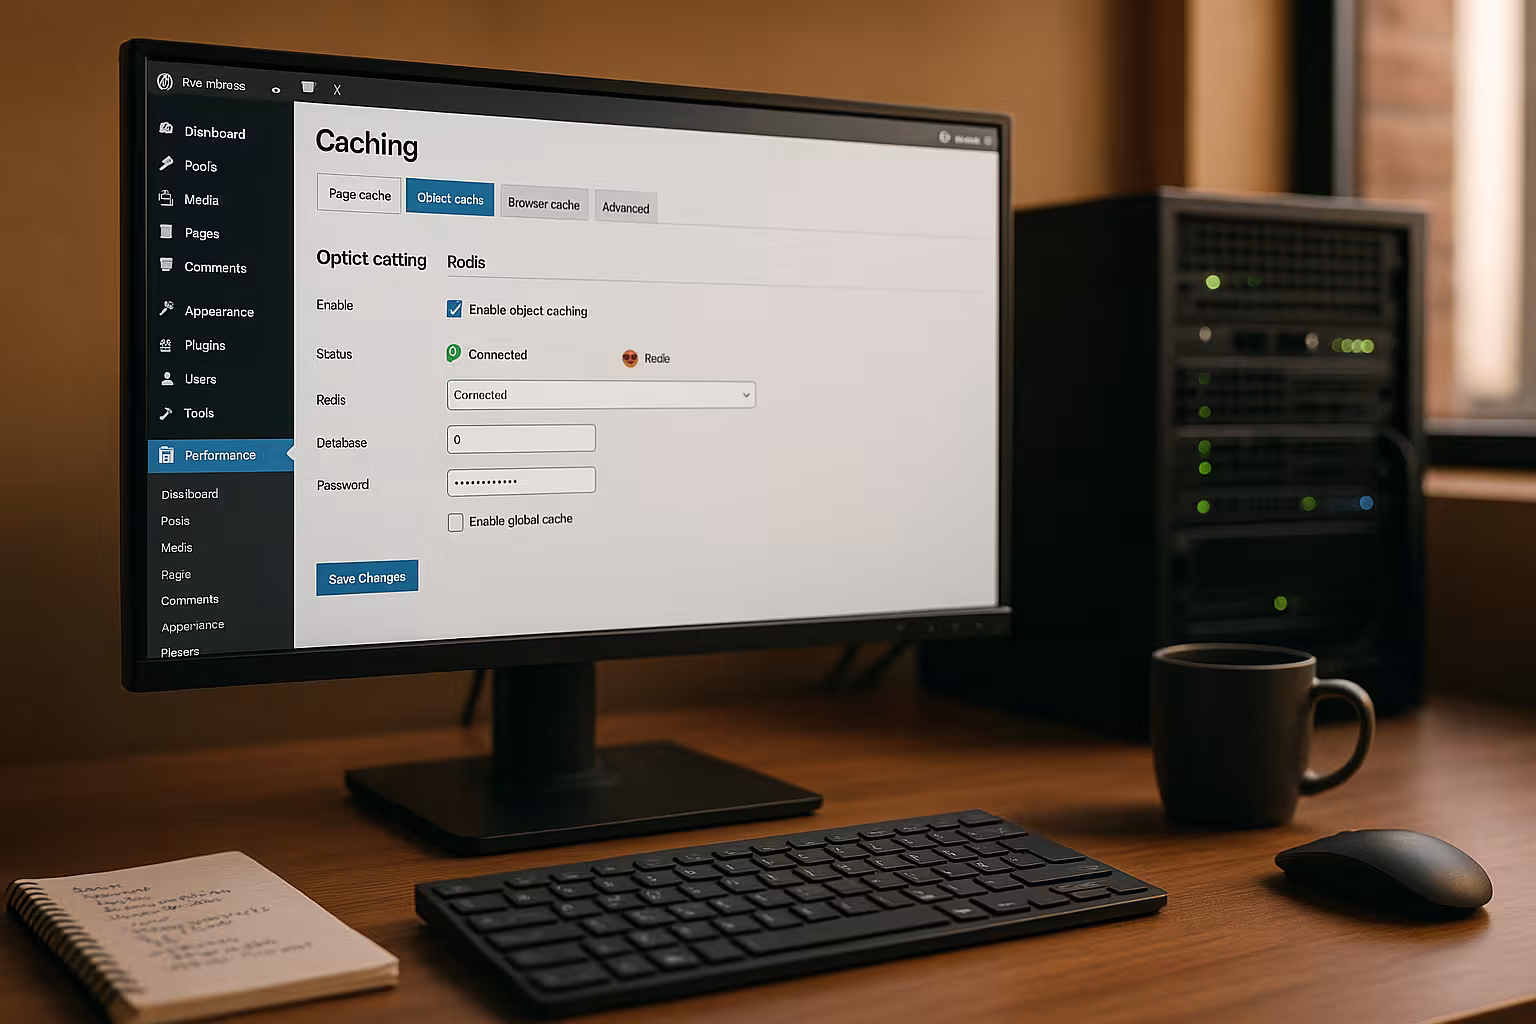
Many caching plugins can use Redis as a backend for the object cache and supplement it with page cache, HTML minify or image optimization. I particularly like to use LiteSpeed Cachebecause I can conveniently control object cache with Redis, edge-side includes and image formats such as WebP there. I activate the object cache in the settings, select "Redis" as the method and enter the host, port or socket. The connection test immediately shows me whether everything is up and running and the cache is working. This combination provides dynamic Contents quickly and also ensures that anonymous visitors are often served directly from the page cache.
WooCommerce, member areas and ESI
For stores and login areas, I deliberately hold back the page cache, but rely heavily on the object cache. For parts that are personalized (shopping cart indicator, greeting, wish lists), I use edge-side includes (ESI) or fetch the fragments on the client side. It is important to have a clear Varystrategy (e.g. according to cookies or roles) so that anonymous visitors benefit to the maximum, while logged-in users see consistent, dynamic content. Redis delivers the building blocks at lightning speed without having to rely on full page identity [1][2][3].
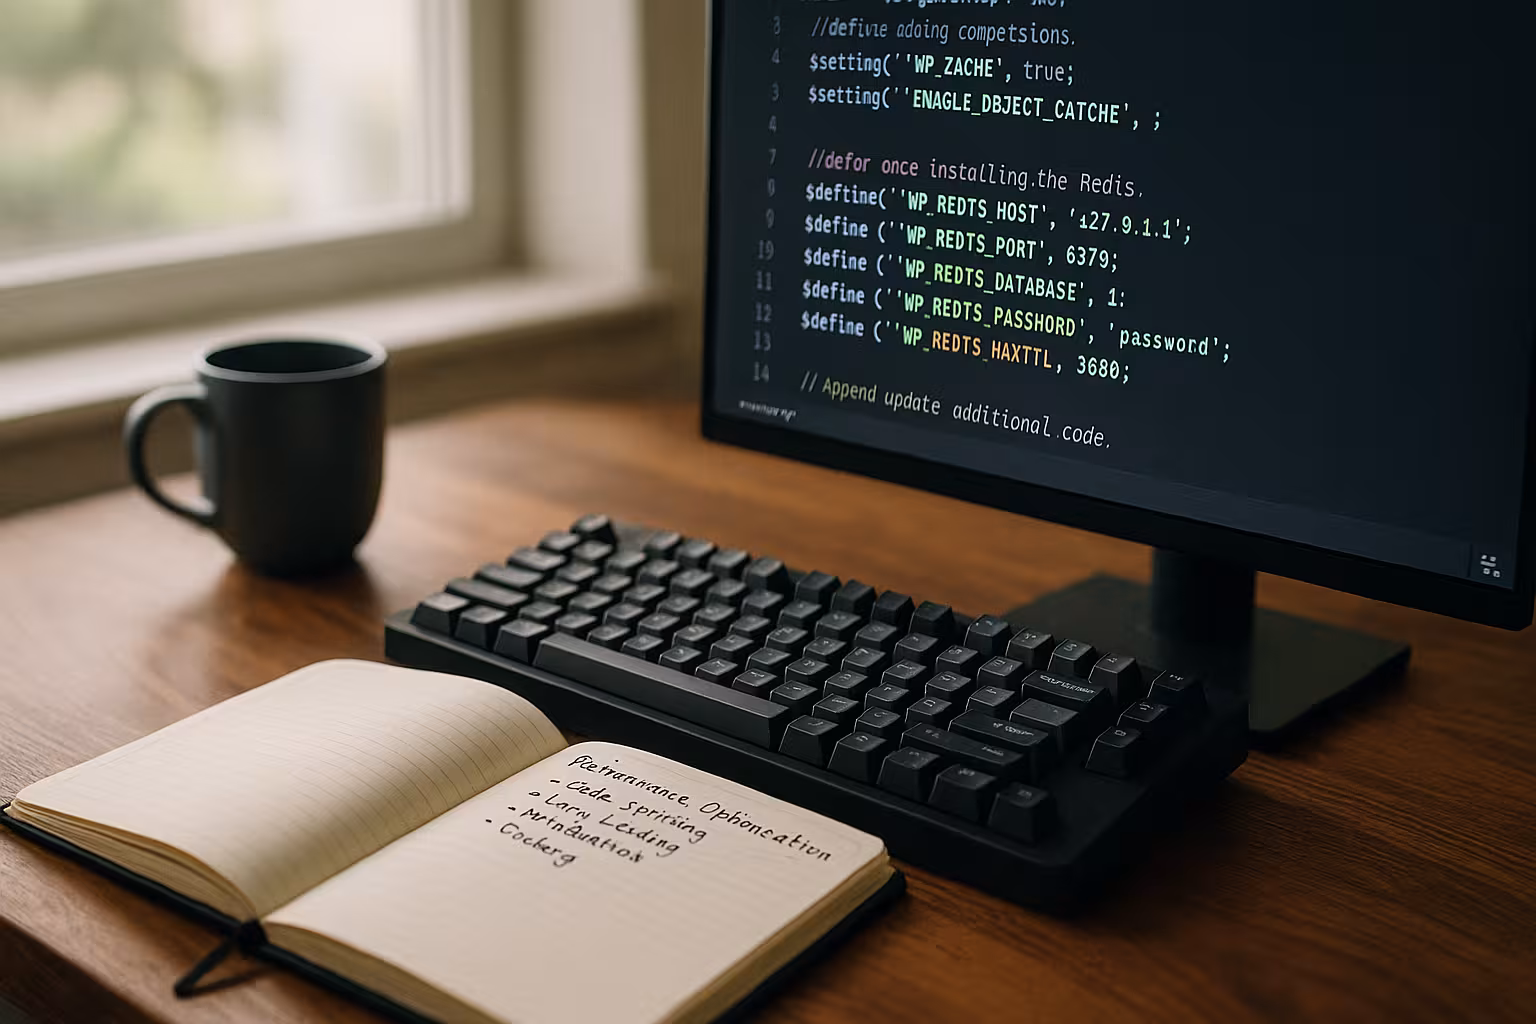
Fine-tuning: wp-config and redis.conf
For socket connections, I set specific constants in wp-config.php so that WordPress uses the correct address. I define the schema and path and check whether the socket exists and has the appropriate permissions. I use redis.conf to limit the memory with maxmemory and select a sensible eviction policy, often allkeys-lru. In this way I keep the cache calculable and prevent Redis from giving the system the RAM is in dispute. I also assign a password or use bind addresses and firewalls so that nobody can access Redis from outside. queries [1][4].
// wp-config.php
define('WP_REDIS_SCHEME', 'unix');
define('WP_REDIS_PATH', '/tmp/redis.sock');

// redis.conf (example)
maxmemory 256mb
maxmemory-policy allkeys-lru
requirepass SecretPassword123

TTL strategies, evictions and targeted invalidation
A good cache is not only fast, but also predictable. I allocate TTLs by data class: short TTLs for volatile feeds, longer ones for menus, almost none for rarely changing taxonomy mappings - limited by a MaxTTL. For updates I invalidate selectiveinstead of clearing the entire cache: When saving a product, I only purge keys that affect the relevant categories, price filters, product lists or widgets. This keeps the hit rate high and reduces peak loads [2][4].
About the eviction policy: allkeys-lru is usually the most robust choice because it displaces obsolete, little-used keys first. If my setup has strict TTL specifications, I can volatile-lru may make sense (only keys with TTL are displaced). I monitor the miss rate after changes; if it rises sharply, the RAM budget is often too small or the TTL is too short [1][4].
Typical errors and quick solutions
If WordPress mixes up socket and TCP, the object cache remains empty or reports connection errors. I then check the plugin settings, host/port or the Unix socket and take a look at the server logs. If the cache empties too frequently, I adjust TTL values and the invalidation triggers, e.g. when saving posts or products. For multiple WordPress instances, I assign separate Redis databases so that entries do not overwrite each other. This is how I keep the Data cleanly separated and receive a clearly comprehensible Cache-structure [4].
Avoid cache stampede
Without protection mechanisms, the expiry of many popular keys can lead to a "Thundering Herd": Hundreds of requests rebuild the same content. I mitigate this by setting slightly offset TTLs, protecting rebuilds with locks and - if the plugin offers it - using Stale-While-Revalidate use: Expired entries are briefly delivered while new entries are created in the background. This keeps response times stable, even during traffic peaks [2][3].
Measure and accelerate permanently
I don't rely on gut feeling, but measure TTFB, First Contentful Paint and server response times before and after each change. Tools in the browser, server metrics and plugin statistics show me bottlenecks. I also combine object cache with clean page cache and relieve PHP via server-side mechanisms such as Nginx microcaching or Apache accelerators. A good introduction is provided by the compact Server-side caching Overview. This is how I increase the Performance step by step and achieve permanently short Loading times.

Important key figures and diagnostic commands
I regularly look at these metrics for operations:
- Keyspace hits/missesRatio shows the effectiveness of the object cache.
- evicted_keys and expired_keysIndicates too little RAM or TTLs that are too short.
- used_memory, mem_fragmentation_ratio: Provides information on actual usage and fragmentation.
- connected_clients, blocked_clients: Indications of bottlenecks under high load.
I use simple commands on the server, such as redis-cli INFO, redis-cli MONITOR (only for a short time) and redis-cli MEMORY STATS. In WordPress itself, debug plugins and the statistics of the Object Cache plugin help to assess cache hits, latencies and groups [2][4].
Alternatives briefly classified
File-based caching works simply, but is limited by heavy traffic or many dynamic elements. Memcached is also an in-memory cache and fast, but offers fewer data types and less flexibility than Redis. Page cache stores complete HTML pages and is perfect for anonymous users, while object cache accelerates dynamic blocks. Together with a CDN, I reduce distances and load peaks worldwide. The right Combination determines the result, and Redis delivers the fast Substructure.
When I deliberately do not use Redis
Very small sites without a database load or extremely static projects (headless with pre-rendered pages) only benefit minimally. Even with very limited RAM on shared systems, a cache that is too small can cause more evictions than benefits. In such cases, I tend to focus on page cache and clean asset management and only switch on Redis when measured values show a clear gain [1][5].
Hosting with Redis: a brief comparison
For reliable object caching, you need a provider that provides Redis and allows enough RAM for the cache. I look for guaranteed resources, SSH access and the option to configure sockets or ports properly. A well-documented panel and fast support save time in everyday life. The following overview shows the key data for a typical selection. How to find the right Tariff easier to choose and the later Configuration succeeds smoothly.
| Provider | Redis support | Performance | Price/performance | Support |
|---|---|---|---|---|
| webhoster.de | Yes | Top class | Excellent | Very good |
| Provider B | Partial | Good | Good | Good |
| Provider C | No | Sufficient | Sufficient | Satisfactory |
Scaling, latency and high availability
As a project grows, I pay attention to the topology: local UNIX sockets are the fastest, as long as the web server and Redis are running on the same host. For separate servers, I choose a close network latency and ensure sufficient bandwidth. For High availability replication and sentinel; in pure cache setups, I often do without persistence (RDB/AOF) to save I/O. If a node is lost, the cache rebuilds itself and the page can still be served quickly thanks to the page cache [3][4].
Security and multi-site/multi-instance setups
I never expose Redis unprotected to the public network and set bind addresses, firewall rules and a password. On shared servers, I prefer to use Unix sockets with restrictive rights. If I run several WordPress installations, I assign each site its own Redis DB ID and, if possible, separate namespaces. This prevents collisions and helps me keep an overview. Security hardly costs any time, but preserves the Integrity the data and protects the Availability.
ACLs, rights and access restriction
In addition to the password, I set dedicated Redis users with restricted rights if possible. I only allow the commands that my setup needs and block administrative commands. Bind addresses (bind 127.0.0.1 ::1) and firewalls limit access to internal networks. I use separate access data and prefixes for staging and development, so I can never accidentally overwrite productive data [4].
Practical workflow: from testing to going live
I start in a staging environment, activate Redis, measure, optimize and roll out the changes according to plan. Before going live, I clear the cache, warm up important pages and monitor the server metrics under load. If timeouts or unusual miss rates occur, I adjust policies, TTLs and the size. For more in-depth tuning ideas, I regularly use compact guides on WordPress performance. This is how I ensure a controlled Introduction and receive a cleanly documented Configuration.
Prewarming, releases and selective purging
After deployments, I prevent cold starts by automatically calling up important pages (sitemap-based prewarming) and prewarming critical queries. When releasing content, I purge specific affected areas (e.g. a category and its archive pages), not the entire site. This keeps the hit rate high and ensures that peak loads hit caches that are already warm. I document which hooks trigger purges and test these paths in staging so that the live run runs smoothly [2][4][5].
Takeaway: My short summary
Redis speeds up WordPress significantly because the object cache saves expensive queries and delivers content directly from memory. I combine Redis with a page cache and, depending on the project, a CDN for global reach. With a clean setup, correct socket/port specifications, appropriate memory limits and a secure connection, the system remains fast and reliable [1][2][3][4][5]. Measured values decide on every change, not gut feeling. This is how I achieve short Loading timesbetter User experience and a noticeably faster WordPress site.