In Windows 10 the Mail App is available free of charge. Here you can synchronize your eMails directly with the server. The settings are suitable for most programs.
Just click on the mail application and follow the steps in this guide.
Please click on "Start" if you have not yet created an email box, or create a new email box.
Now click on "Add account".
Please select "Advanced Setup" to create an IMAP account.
Click "Internet E-mail" to create the account.
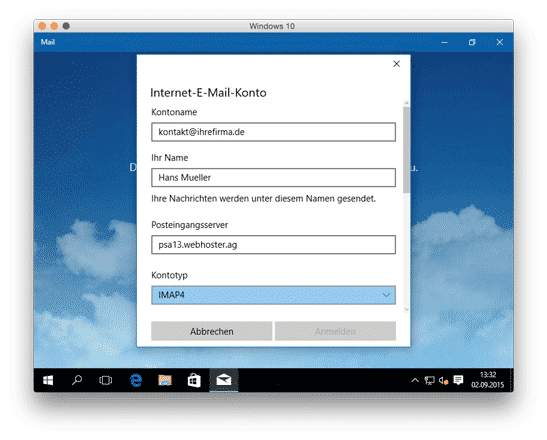
Please enter your Data on. The incoming mail server in this example is psa13.webhoster.ag. Please use the server name we have given you. The account type is IMAP4.
As user name you have to enter your email address with the corresponding password. You have defined this yourself. For old Confixx systems the username is e.g. web123p1. For Plesk the username is your email address. The outgoing mail server is the same as the incoming mail server. Please also check the boxes as shown in the pictures.
The two SSL check marks are very important for the encryption of the connection to the server.
If you click on "Register" you have done it.
If you have already received an email, it will be displayed directly.
Please note that the IMAP folders may not all be visible immediately. You can activate or display them manually. But they will also be displayed if you have sent, deleted or designed the first email.
All e-mails you write or read are now synchronized on all devices on which you have set up the mailbox.


